Micromass MassLynx
What if you don't have ProteinLynx?
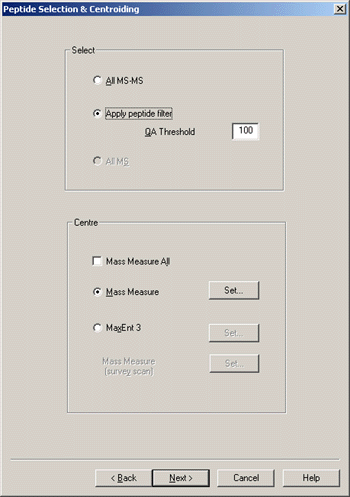
In MassLynx 3.5, the tools for creating peak lists for database searching are part of ProteinLynx.
Without this option, it is difficult to create good quality peak lists. For example,
if we use the following Mass Measure options:
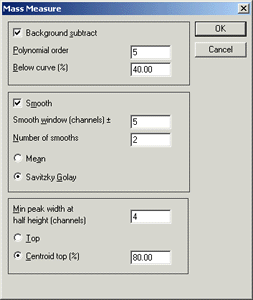
to process a typical MALDI spectrum, (a combination of 13 continuum spectra), we
are likely to get something similar to this:
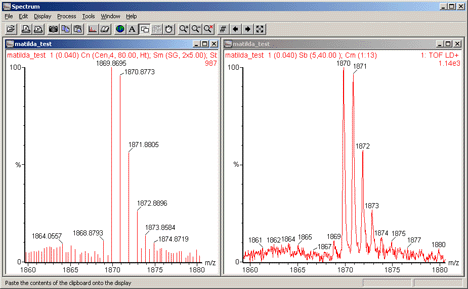
The "real" peaks have been detected, but so have a large number of noise peaks.
Increasing the smoothing or using a higher order polynomial for baseline subtraction may help
in some cases. But, in general, there will still be ten times as many noise peaks as real peaks,
which means that a Mascot peptide mass fingerprint search is unlikely to produce a useful
result.
Short of peak picking by hand, the best course of action is to select a sub-set of peaks based on
intensity. Make sure you are displaying the full spectrum and the peak labels have a
reasonable number of decimal places. Copy the mass and intensity values to the clipboard,
(Edit; Copy spectrum list). Then, paste the values into a spreadsheet, sort by
descending intensity, and select the more intense peaks. The optimum number of peaks to
select will have to be determined by trial and error, but is likely to be in the range
50 to 150.
Copy and paste the selected values into the Mascot search form, and you have every chance
of getting an decent result. However, a simple intensity threshold can never
do a perfect job because there are real peaks at the high mass end that
are weaker than the noise peaks at the low mass end. Also, an ideal peak list needs to be
be de-isotoped. That is, it should only include the monoisotopic peak from each isotope cluster.
Fortunately, ProteinLynx includes tools for selecting monoisotopic peaks, and also enables
peak list files to be created automatically from a sample list. The remainder of this article
illustrates peak detection using
MassLynx 3.5 (change note 367) with ProteinLynx, BioLynx, and MaxEnt 3 options.
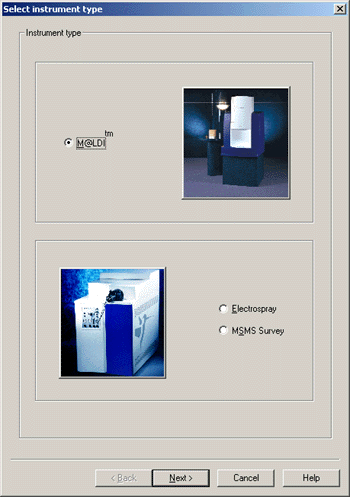
M@LDItm peptide mass fingerprint
This simple example is for post-acquisition processing of a single data file. First,
we create a sample list in which the Process is PeptideAuto
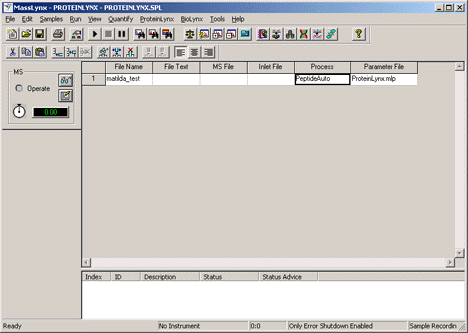
A suitable Parameter File is created or modified using the ProteinLynx Setup wizard.
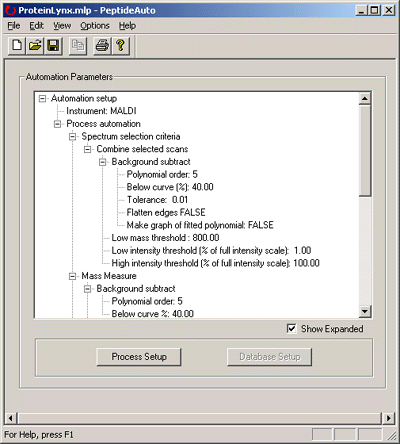
Click on Process Setup. This example is for a M@LDItm
Choice of combine method obviously depends on the dataset. For Centre, this example uses Mass
Measure rather than MaxEnt 3, because de-charging of MALDI peptide mass fingerprint
data is not usually necessary. Make sure that the Text Export checkbox, Determine monoisotopic
peaks, is checked.
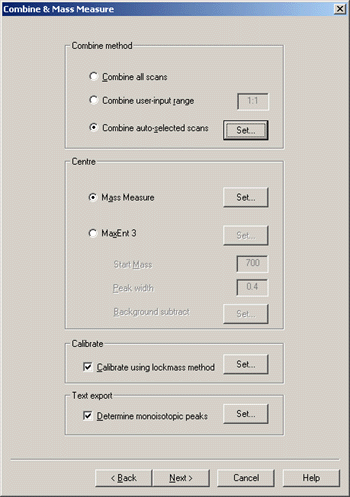
The options for Auto Select are not critical

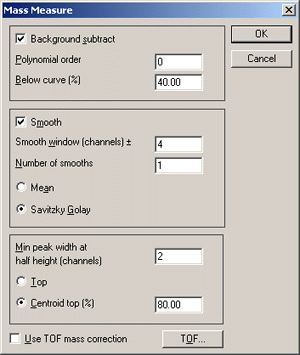
Background subtract is essential for MALDI data.
The recommended settings of 5th order and 40% seem to work well. Smoothing reduces
the chance of a peak being split on noise, but oversmoothing can increase the number
of baseline noise peaks that pass the Mass Measure minimum peak width criterion.
Ideally, you should experiment with typical data to determine the optimum settings
for smoothing. Minimum peak width and centroid top settings don't seem critical.

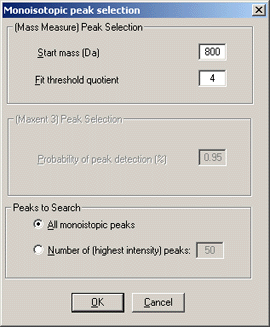
In the Monoisotopic Peak Selection dialog, set the low
mass threshold to something appropriate for peptide mass fingerprinting, e.g. 500 to
800 Da. Make sure that the Peaks to Search radio button is set to All monoisotopic
peaks.
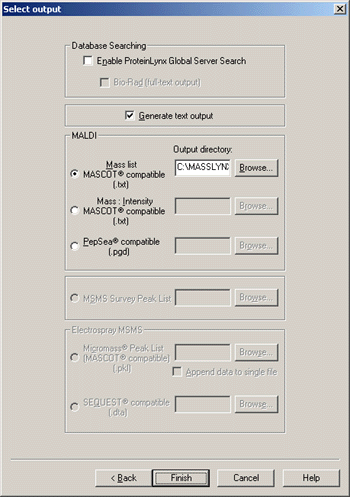
In the select output dialog, check Generate text output, and (naturally) choose
one of the two Mascot options. The default location for the peak list file is the
current temp directory. It is better to specify an explicit path, either on a
project basis or a sample list basis, because this will simplify setting up Mascot Daemon
in real-time monitor mode to search the peak lists automatically.
Press finish and save the Parameter file. You are now ready to Run
the sample list. The peak list quality can be excellent. When the data file used for the
earlier illustration was processed using these parameters, the peak list contains 66 mass values.
A Mascot peptide mass fingerprint search showed one excellent match and two probable
matches, accounting for 44 of the 66 values,
(results).
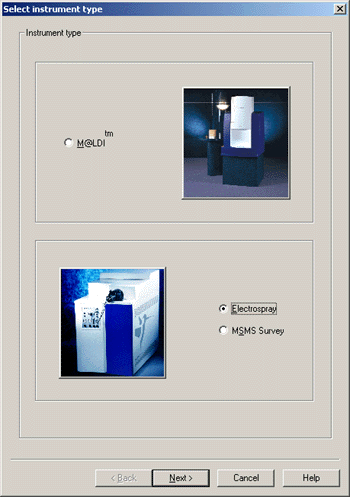
QTOFtm LC-MS/MS
Processing LC-MS/MS data into a peaklist is a more complex task because the spectra need
to be combined in the time domain according to precursor mass. This is handled automatically
by ProteinLynx when the instrument type is Electrospray.
The default setting for the QA filter does a good job of removing spectra that contain
nothing but noise. For time domain processing, choose either Mass Measure or MaxEnt 3.
Although QTOF electrospray data don't exhibit the high sloping background found
in MALDI spectra, there are usually large numbers of single count spikes. After
smoothing and centering, each spike can end up being output to the peak list. This
is not a fundamental problem, because Mascot discriminates against low level noise in MS/MS
data. However, it can be an inconvenience because it significantly increases the size
of the peak list. If you are searching on our public web site, there is a 5 Mb limit on
the size of an upload, and you may hit this limit with only a modest number of spectra.
Secondly, Mascot has a limit of 10,000 peaks in any individual MS/MS spectrum.
Normally, any spectrum that approaches this limit is not a peak list, but profile data,
and the limit serves as a warning that the results will not be as good as if a
well processed peak list was being used.
Fortunately, the majority of these single count spikes can easily be removed by
using a zero order polynomial for background subtraction. The only time you might
choose not to do this is when the spectra are very weak, and 1 or 2 count spikes
represent real peaks. Otherwise, the Mass Measure parameters are very similar to the
MALDI case.
In the select output dialog, check Generate text output, and choose Mascot
compatible .pkl format. Check to append all peak lists to a single file. As
before, it is better to specify an explicit path for the peak lists, either on a
project basis or a sample list basis, because this will simplify setting up Mascot Daemon
in real-time monitor mode to perform searches automatically.

Press finish and save the Parameter file. You are now ready to run
the sample list and reduce a complete LC-MS/MS dataset to a single .pkl file.
Low intensity data
If the data are weak, then the above processing can be too harsh. In such cases,
it may be better to use a lower QA threshold, such as 10, and not to attempt background
subtraction. Smoothing could be reduced to one or two passes of 3-channel Savitzky-Golay.
MaxEnt 3
In some cases, MaxEnt 3 can produce a significantly better peak list from MS/MS data. The main
drawback is processing time. This depends on data quality and processing parameters, but a ballpark
figure for a 1 GHz Pentium 4 system is >4 hours to reduce a ~500 Mb RAW file to ~200
MS/MS peak lists.
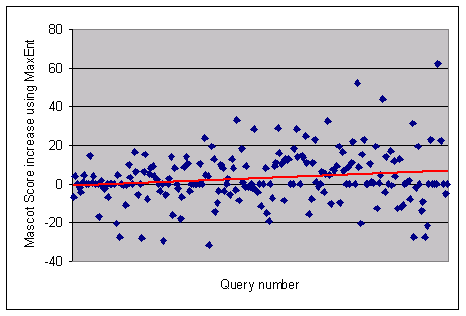
Compare the results from Mascot searches of a data set processed by MassLynx
Mass Measure and
MaxEnt 3. For some queries, the score improvement using MaxEnt is dramatic,
e.g. the score for query 200 increases from 28 to 90. In other cases, conventional processing
produces the higher score, e.g. 108 versus 77 for query 76. The general trend (in red) indicates
that MaxEnt is a benefit for the larger peptides, where multiply charged fragments are more
abundant.
Automation using Mascot Daemon
Option 1: Real-time monitor
ProteinLynx allows peak lists to be created automatically during data
acquisition. By running Mascot Daemon in real-time monitor mode, each peak list
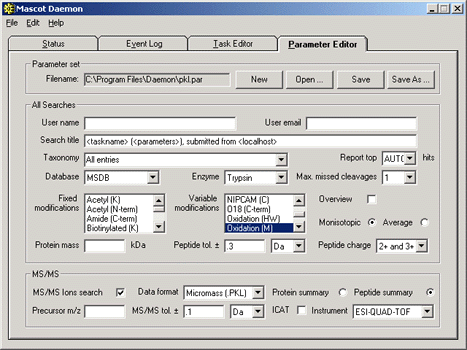
can also be searched automatically, as soon as it appears. First, create a suitable parameter
set for the task:
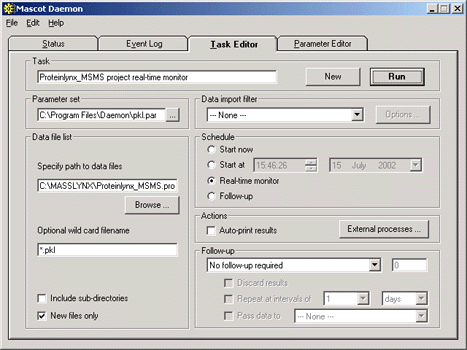
Second, create a real-time monitor task to monitor the directory where the .pkl files
are being created. Mascot Daemon tasks run in parallel, but the searches within a task run
serially. If you have multiple MassLynx projects, you may find it helps to direct the .pkl
files for each project into project specific directories, with a distinct Daemon task
assigned to each.
Option 2: MassLynx Sample List
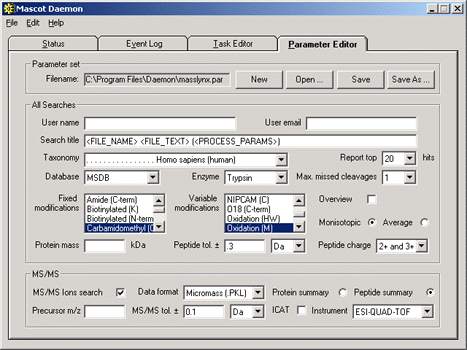
Alternatively, Daemon can perform a batch task to search the .PKL files from a specific MassLynx sample
list. The advantage of this approach is that information from the MassLynx sample list can be transferred
to Mascot and used in the results reports. For example, if the sample description is in the 'File Text'
field, this can be placed into the Mascot search title by using the <FILE_TEXT> tag:
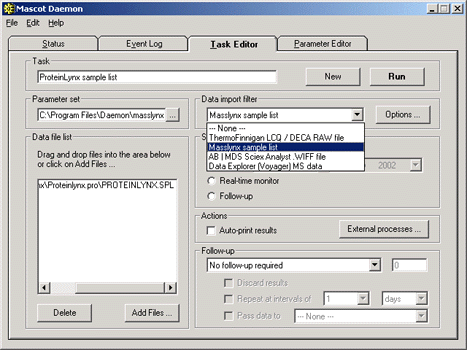
To specify that peak list filenames are to be taken from a MassLynx sample list, choose this
option from the data import filters. The location of the .pkl file directory must
be specified in the filter options. Then, add the sample list name(s) to the data file list box.
If the Mascot task is to be run post-acquisition, then the MassLynx sample list is best
opened as a batch task. If you want to start the task running before data are acquired, or
during acquisition, then you should create the task as a real-time monitor. This ensures
that Daemon will wait until each .pkl file appears. Unlike a batch task, where a file that
is 'missing' when the task is started is dropped from the list.
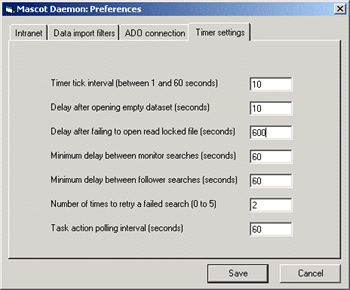
Real-time Monitor Mode with MaxEnt 3
In real-time monitor mode, it is important that Mascot Daemon waits until a file is complete before
submitting it to Mascot. To avoid taking a file that is still being written, it checks the file size
at intervals, and waits until it has stopped increasing. The default interval is 60 seconds, which works
fine for conventional Mass Measure, but may not be long enough for MaxEnt 3, where the file size
grows only slowly. To use real-time monitor mode with MaxEnt 3, increase the interval by going to the
Timer Settings tab of the Preferences dialog. Increase the value of 'Delay after failing to open
read-locked file' from 60 seconds to (say) 600 seconds.
Acknowledgements
MassLynx, ProteinLynx, BioLynx, M@LDI, QTOF, and MaxEnt are trademarks of Micromass Ltd. We are
most grateful to Darryl Pappin of Imperial College London for the example of M@LDI data and to
Gavain Sweetman of Cellzome Ltd. for the example of QTOF data.
|